How to use a Firefox Web Browser to upload files for your MAIN Domain hosted website.
Before you begin uploading, make sure you have your website page(s) and graphics ready and are connected to the internet. Make sure that your home page file is named EXACTLY:
index.html
(make sure all the letters are lower case!).
For a checklist for registering, hosting, creating and maintaining websites on MAIN click here.
Getting Firefox
This can be used with all Windows and also Mac OS X systems. Firefox is a web browser that is much more secure than Internet Explorer.
It also supports modern features such as tabbed browsing.
1. Get the Firefox web browser: Click Here
2. Get FireFTP, an extension to the Firefox browser that allows you to transfer files with the browser. Do a search for FireFTP at the link and follow the directions to install it:
Click Here Close and then reopen Firefox to enable FireFTP, it will be loaded in when the program restarts.
3. In Firefox, go to the "Tools" menu, and if it is installed properly, you will see FireFTP. Click on it.
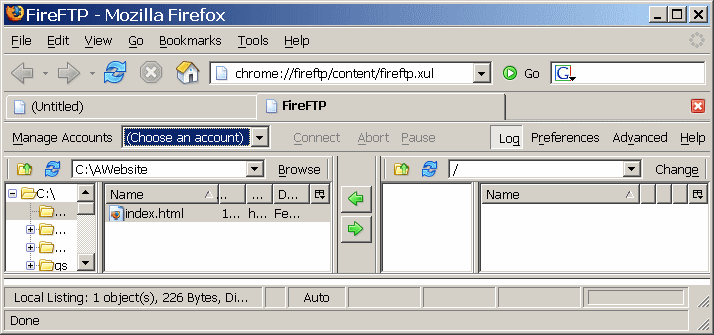
4. Click on "Manage Accounts", then click "New".
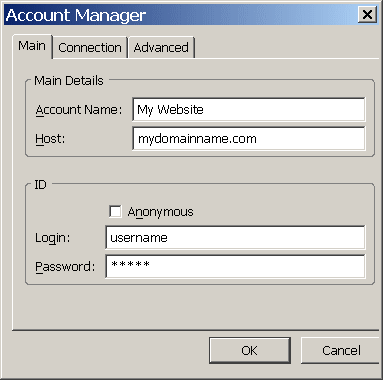
"Account Name" - enter whatever you want, possibly your website name or MAIN
You may need to refer to your MAIN Domain Reference Sheet for:
"Host" - your website address without the "http://", example: www.bobsservice.com
"Login" - your MAIN username from the sheet
"Password" - your password from the sheet
Click "OK" to save the changes. (When you come back later to update your site, you can click on "Choose An Account"
and choose whatever you named the account and click "Connect".)
5. Connect to the internet however you usually do.
6. Click the "Connect" button on FireFTP. It will connect to MAIN's server where your website is hosted.
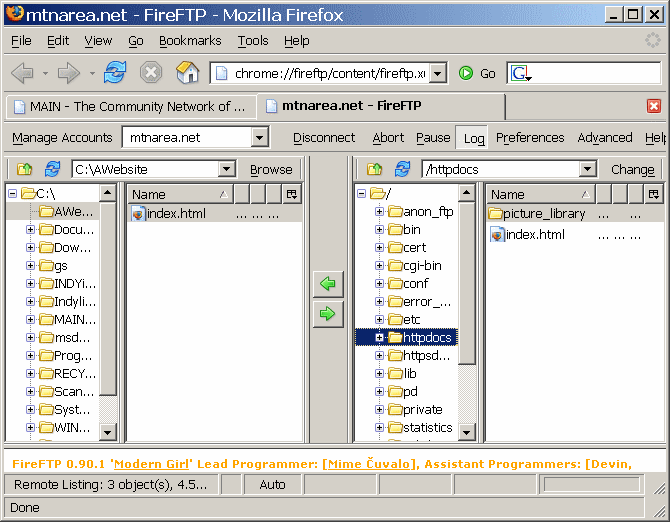
On the left side of the window are the files and folders on your hard drive and on the right hand side is your webspace on MAIN's web server.
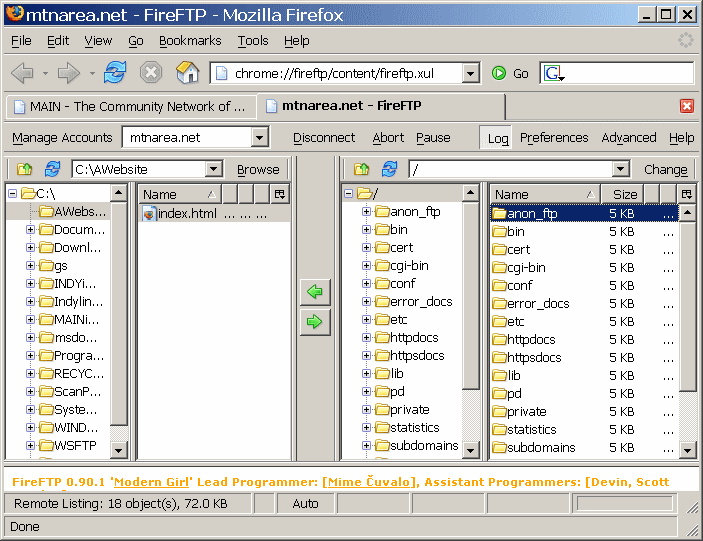
7. Find:
httpdocs
and doubleclick on it to open it, as below.
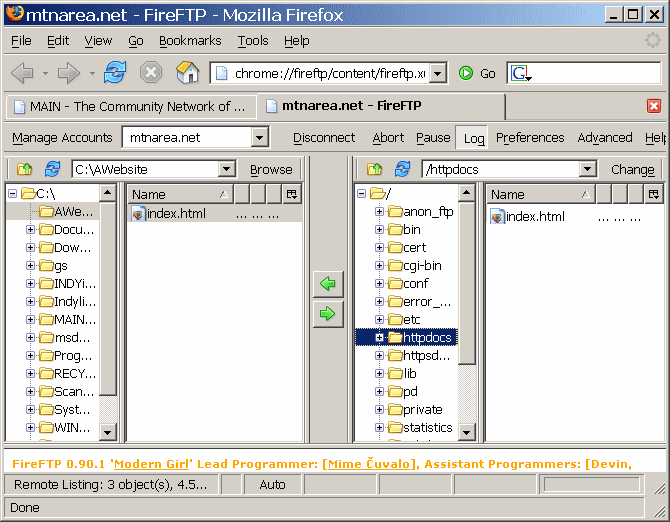
You will see an index.html which is MAIN's placeholder file for your website informing visitors that it is being hosted
by MAIN. This is the file you want to replace with your homepage file. (Windows users: right click on index.html, then
click on Delete and confirm the Delete. Mac users: click and hold down on index.html, then click on Delete and confirm
the Delete.)
8. Locate your homepage file on your hard drive. Use the windows on the left hand side to navigate to where the file is
stored. (We cannot give exact instructions for this as everyone's computer is set up differently!) Make sure your
homepage file is named exactly:
index.html
and make sure it is all lower case letters. If you don't do this, the server will not locate your home page and will give you an error message when you try to go to your website. If you need to change the name, do so before you transfer it.
9. To transfer the index.html file from your computer to ours, click on the
index.html file on the left hand side once to highlight it and then click on the arrow pointing to the right (in the center strip between the windows) to transfer the file
to MAIN's web server. Transfer the rest of the files for your web pages in a like manner.
10. You can continue as above to transfer your images, such as pictures and illustrations or, in order to organize things better, you can make a folder just for your graphics. In the graphic below it shows a folder called
picture_library
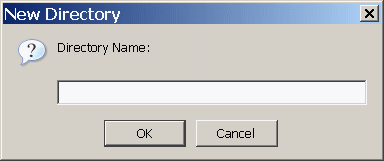
on the right hand side. If you want to create a folder like this, Windows users: right click in the blank area underneath index.html (the right hand side), then
left click on Make Directory fill in the name you want and click OK. Mac users: click and hold down in the blank area underneath index.html (the right hand side), then click on Make Directory fill in the name you want and click OK.
You should end up with something like this:
11. To check your website, go to "File", then "New Window" (or "Tab") and enter your website address in the address bar and check to see
what your website looks like. (You should be able to check your website with the FTP connection still open in most cases.) When you are done, click "Disconnect".
