| ||||
| Home / Help / WS-FTP Dedicated Directory Setup | ||||
|
Here are the steps we will be following to upload your files to your Dedicated Directory on our server so your website can be viewed over the internet: Configure WS-FTP Configure WS-FTP:  If you've got all your user information and a working copy of WS-FTP on your computer, you are ready to begin. In this tutorial,
I'm going to use a fictitious organization as the example to show you how
to upload your files. The organization is called the "True Natives". Throughout
the tutorial you'll substitute your organization's information in place of
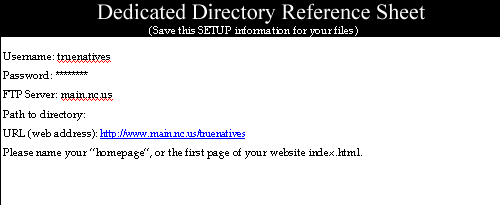
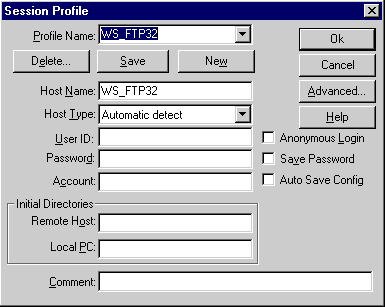
the "True Natives" information. Open your WS-FTP program. You should see something like this:  We're going to create a new profile to enter the information that will connect you with MAIN. Click "New." You should see the same screen only with empty boxes:  You will need to fill in the following fields with information from your Dedicated Domain Account Reference Sheet:
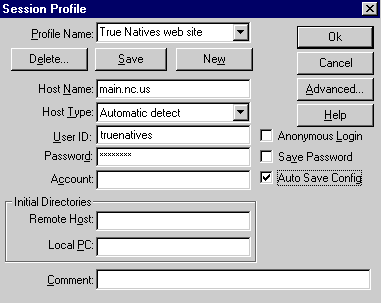
Below I've configured WS-FTP for the 'True Natives' organization. You can use this as an example, and substitute your own information from your Dedicated Domain Account Reference Sheet.  Once you've entered all the correct information, click the checkbox for "Auto Save Config" to keep these settings. You may also click the checkbox to "Save Password". If you don't, you will be asked for a password each time you connect. If you do choose to save your password WS-FTP will automatically connect and verify your password without you having to enter it. Now click "Ok." Next page>> | ||||
|


