| ||||
| Home / Help / Fetch Tutorial, part 3 | ||||
|
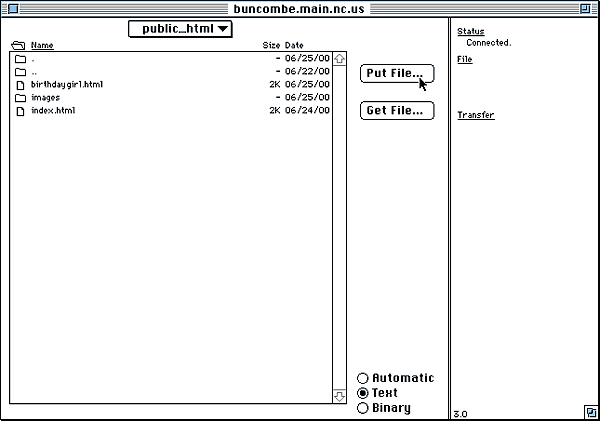
Notice, the pull-down menu now says public_html instead of your user name. This means that you are now inside the public_html directory/folder. This is where your webpage files will go.
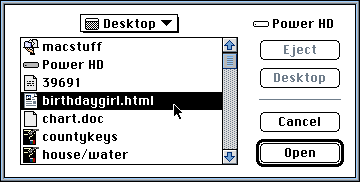
Verify that the Text radio button is selected at the bottom of the window. Then click Put File... to upload your first html document (The html document that you wish to be your default/home page should be named index.html). You will be presented with the standard open dialog box. Navigate to a html file and double-click it to initiate the file transfer.
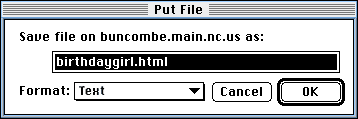
You will then see a confirmation box asking how you wish to upload the file. Text should already be selected in the pull-down menu, so just click OK.
Repeat for as many html files as make up your website. Don't upload your graphics files yet. They're covered in the next step. | ||||
|