Scanning
at Charlotte's Web
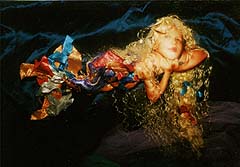
Doll and Photo © 1995 by Cordelia Williams
a
how-to guide for Open Studio participants
To begin, create a folder for
your files in the OpenStudio directory.
- Double click Windows
Explorer icon (on the desktop) to open.
- Click on OpenStudio folder.
- In File pulldown menu,
select New, then Folder.
- A New Folder will
appear; rename it with your name, or whatever you like.
Make sure the scanner is turned
on. If it isn’t, flip the power switch on the back of the
scanner & then restart the computer so it will recognize the
scanner. To do this, go to the Start button,
select Shut Down, then select Restart
the Computer.
To scan an reflective image
(photograph) in color:
- Place the image on the glass.
- Double click PhotoShop
icon to open.
- In File pulldown menu,
select Acquire, then TWAIN_32. This takes you
to ScanWizard, the scanning software.
- Preview window will appear.
- In the top right corner,
there are three arrows. Click the top arrow so that it
points to the left & a second window appears. It
will be called Untitled Job 1 (or 2 or 3, etc). This will
enable you to define colors, size, resolution, etc.
- Click photo icon just to the
left of these arrows to make sure that Reflective is
selected.
- In the second window, select Millions
of Colors, 72 dpi, Pixels (as unit of
measure), & Color Correction. Make sure the
lock icon is in unlocked position. Scale will depend on
the size of your original.
- Click Preview button.
- When you can see the
previewed image, define the area to be scanned with the
cropping tool (the dotted box in the tool bar). The
cursor will be + shaped. Click & drag to
define the area you wish to scan.
- Now you can decide how to
scale your image. As a rough guide, never make the
image larger than around 500 pixels wide or 400 pixels
tall. And always keep your file size under 250 kilobytes.
Smaller is better, always, so that the time it takes
to load images won’t be too long. The more images
you include on one page, the smaller you should make each
one.
- Click the Scan button.
When scanning is complete, another image will appear
behind the windows.
- Close the Preview window.
This takes you back to Photoshop.
If you want to keep a copy of
the image for additional uses or manipulation (like resizing),
save it first as a PhotoShop file (psd). This format contains
more information; you can resize it without as much loss of
clarity as with other formats designed for web browsers. (You can
also save it as a Tagged Information Format (tif) file, which
more applications will recognize & open, but the files will
probably be MUCH larger.) Generally, scan & save the image in
the largest size you plan to need.
For color, the formats that are
recognized by the browser are jpeg (or jpg) & gif. If
it is a painterly image (like a photo), the best format is
usually jpeg. If the image is more linear (with large areas of
flat color &/or sharp edges), gif is a better choice. Black
& white materials are almost always better as gifs. If
you’re not sure, choose gif.
To save as a psd file:
- In File pulldown menu,
choose Save As.
- Go to the directory you
created.
- Under File Name, type
in the title.
- Under Save As, choose psd
format.
To save as jpeg file:
- In File pulldown menu,
choose Save As.
- Go to the directory you
created.
- Under File Name, type
in the title.
- Under Save As, choose jpeg
format.
- A Jpeg Options window
will appear. Medium resolution is the default. Click OK.
To save as a gif file:
- In the Mode pulldown menu,
change to Indexed Color.
- In the dialog window, say OK
to defaults: resolution, 8 bits/pixel; pallette,
adaptive; dither, diffusion.
- In File pulldown menu,
choose Save As.
- Under File Name, type
in the title.
- Under Save As, choose gif
format.
- A box warning you about loss
of image data will appear. Click OK.
To crop an image in PhotoShop
- Choose the Cropping Tool
(shaped like a dotted box). You can Zoom
in if needed; select that option in the Window
pulldown menu.
- The cursor will be +
shaped. Place the cursor at one corner of the area you
wish to retain, click & drag to the opposite corner
of the area.
- Choose Copy or Cut.
- Choose File, then New.
The new window will automatically be the size of the area
you just defined.
- Say OK to defaults.
- In the Edit pulldown
menu, choose Paste.
- Go to your directory, choose Save
As, & follow above instructions to save as
whichever format is appropriate.
To resize an image:
- In Image pulldown
menu, select Image Size.
- To keep the image
proportional, put an "x" next to Constrain
Proportions.
- Choose Pixels as the
unit of measure.
- Change either width or height
& the other proportion will automatically change.
Make sure you check your image & file size before you
proceed, so that your file isn’t too large.
- Say OK.
- Go to your directory, choose Save
As, & follow above instructions to save as
whichever format is appropriate.
To scan a greyscale image:
- Follow directions for
scanning in color, except that in Step 7, you will
choose 256 Shades of Grey.
To scan line art:
- Follow directions for
scanning in color, except that in Step 7, you will
choose Line Art.
- You will probably want to
slightly blur the edges for better online display. In
PhotoShop, this is called Soften or Diffuse
or Blur. These are found in the Filter
pulldown menu. It is sometimes known as anti-aliasing.
This creates an edge of pixels that blend background
& foreground colors, making the image appear less
jagged.
- Convert the image to Greyscale
(under the Mode pulldown menu) to enable
Blur menu items.
To scan a slide or transparency:
- Follow the directions for
scanning in color, except that in Step 1,
you’ll use the masking template (that hangs
on the wall behind the scanner), & in Step 6,
you will choose Positive Transparency.
TROUBLE SHOOTING
If, when you try to open
scanning software, an error message tells you that "it
can’t find the scanner", check to make sure the
scanner is turned on. If it is, you may need to restart the
computer to get it to recognize that scanner. Always use
the Start button, Shutdown commands to turn off or restart
the machine.
If you have trouble getting
the software to preview an image, try scanning the whole
area. That may reset to preview function.
If your scans look weird,
unlike your originals, go to the Untitled Job 1 window &
click on the arrow in the bottom right-hand corner. This will
expand the window to reveal more options. Make sure the
options None, None, & Master are selected, then choose
the Reset button. When the dialog window appears, make sure
all the options are checked & choose Reset again. You
can also use these options to enhance your images. Feel free
to experiment, but be sure to reset everything to default
settings as a courtesy for the next user.

Return to Open Studio Resources Page
This page is maintained by Lydia Arnold,
lydi@mindspring.com